Assimp
Static Meshes
The capability of loading complex 3d models in different formats is crucial in order to write a game. The task of writing parsers for some of them would require lots of work. Even just supporting a single format can be time consuming. For instance, the wavefront loader described in chapter 9, only parses a small subset of the specification (materials are not handled at all).
Fortunately, the Assimp library already can be used to parse many common 3D formats. It’s a C++ library which can load static and animated models in a variety of formats. LWJGL provides the bindings to use them from Java code. In this chapter, we will explain how it can be used.
The first thing is adding assimp maven dependencies to the project pom.xml. We need to add compile time and runtime dependencies.
<dependency>
    <groupId>org.lwjgl</groupId>
    <artifactId>lwjgl-assimp</artifactId>
    <version>${lwjgl.version}</version>
</dependency>
<dependency>
    <groupId>org.lwjgl</groupId>
    <artifactId>lwjgl-assimp</artifactId>
    <version>${lwjgl.version}</version>
    <classifier>${native.target}</classifier>
    <scope>runtime</scope>
</dependency>
Once the dependencies has been set, we will cerate a new class named StaticMeshesLoader that will be used to load meshes with no animations. The class defines two static public methods:
public static Mesh[] load(String resourcePath, String texturesDir) throws Exception {
    return load(resourcePath, texturesDir, aiProcess_JoinIdenticalVertices | aiProcess_Triangulate | aiProcess_FixInfacingNormals);
}

public static Mesh[] load(String resourcePath, String texturesDir, int flags) throws Exception {
    // ....
Both methods have the following arguments:
resourcePath: The path to the file where the model file is located. This is an absolute path, because Assimp may need to load additional files and may use the same base path as the resource path (For instance, material files for wavefront, OBJ, files). If you embed your resources inside a JAR file, Assimp will not be able to import it, so uts must be a file system path.texturesDir: The path to the directory that will hold the textures for this model. This a CLASSPATH relative path. For instance, a wavefront material file may define several texture files. The code, expect this files to be located in thetexturesDirdirectory. If you find texture loading errors you may need to manually tweak these paths in the model file.
The second method has an extra argument named flags. This parameter allows to tune the loading process. The firstmethodsjust invokes the secondoneand passes some values that are useful in most of the situations:
aiProcess_JoinIdenticalVertices: This flag reduces the number of vertices that are used, identifiying those that can be reused between faces.aiProcess_Triangulate: The model may use quads or other geometries to define their elements. Since we are only dealing with triangles, we must use this flag to split all he faces into triangles (if needed).aiProcess_FixInfacingNormals: This flags try to reverse normals that may point inwards.
There are many other flags that can be used, you chan check them in the LWJGL Javadoc documentation.
Let’s go back to the second constructor. The first thing we do is invoke the aiImportFilemethod to load the model with the selectedflags.
AIScene aiScene = aiImportFile(resourcePath, flags);
if (aiScene == null) {
    throw new Exception("Error loading model");
}
The rest of the code for the constructor is a as follows:
int numMaterials = aiScene.mNumMaterials();
PointerBuffer aiMaterials = aiScene.mMaterials();
List<Material> materials = new ArrayList<>();
for (int i = 0; i < numMaterials; i++) {
    AIMaterial aiMaterial = AIMaterial.create(aiMaterials.get(i));
    processMaterial(aiMaterial, materials, texturesDir);
}

int numMeshes = aiScene.mNumMeshes();
PointerBuffer aiMeshes = aiScene.mMeshes();
Mesh[] meshes = new Mesh[numMeshes];
for (int i = 0; i < numMeshes; i++) {
    AIMesh aiMesh = AIMesh.create(aiMeshes.get(i));
    Mesh mesh = processMesh(aiMesh, materials);
    meshes[i] = mesh;
}

return meshes;
We process the materials contained in the model. Materials define colour and textures to be used by the meshes that compose the model. Then we process the different meshes. A model can define several meshes and each of them can use one of the materials defined for the model.
If you examine the code above you may see that many of the calls to the Assimp library return PointerBufferinstances. You can think about them like C pointers, they just point to a memory region which contain data. You need to know in advance the type of data that they hold in order to process them. In the case of materials, we iterate over that buffer creating instances of theAIMaterialclass. In the second case, we iterate over the buffer that holds mesh data creating instance of the AIMeshclass.
Let’s examine the processMaterialmethod.
private static void processMaterial(AIMaterial aiMaterial, List<Material> materials, String texturesDir) throws Exception {
    AIColor4D colour = AIColor4D.create();

    AIString path = AIString.calloc();
    Assimp.aiGetMaterialTexture(aiMaterial, aiTextureType_DIFFUSE, 0, path, (IntBuffer) null, null, null, null, null, null);
    String textPath = path.dataString();
    Texture texture = null;
    if (textPath != null && textPath.length() > 0) {
        TextureCache textCache = TextureCache.getInstance();
        texture = textCache.getTexture(texturesDir + "/" + textPath);
    }

    Vector4f ambient = Material.DEFAULT_COLOUR;
    int result = aiGetMaterialColor(aiMaterial, AI_MATKEY_COLOR_AMBIENT, aiTextureType_NONE, 0, colour);
    if (result == 0) {
        ambient = new Vector4f(colour.r(), colour.g(), colour.b(), colour.a());
    }

    Vector4f diffuse = Material.DEFAULT_COLOUR;
    result = aiGetMaterialColor(aiMaterial, AI_MATKEY_COLOR_DIFFUSE, aiTextureType_NONE, 0, colour);
    if (result == 0) {
        diffuse = new Vector4f(colour.r(), colour.g(), colour.b(), colour.a());
    }

    Vector4f specular = Material.DEFAULT_COLOUR;
    result = aiGetMaterialColor(aiMaterial, AI_MATKEY_COLOR_SPECULAR, aiTextureType_NONE, 0, colour);
    if (result == 0) {
        specular = new Vector4f(colour.r(), colour.g(), colour.b(), colour.a());
    }

    Material material = new Material(ambient, diffuse, specular, 1.0f);
    material.setTexture(texture);
    materials.add(material);
}
We check if the material defines a texture or not. If so, we load the texture. We have created a new class named TextureCachewhich caches textures. This is due to the fact that several meshes may share the same texture and we do not want to waste space loading again and again the same data. Then we try to get the colours of the material for the ambient, diffuse and specular components. Fortunately, the definition that we had for a material already contained that information.
The TextureCachedefinition is very simple is just a map that indexes the different textures by the path to the texture file (You can check directly in the source code). Due to the fact, that now textures may use different image formats (PNG, JPEG, etc.), we have modified the way that textures are loaded. Instead of using the PNG library, we now use the STB library to be able to load more formats.
Let’s go back to the StaticMeshesLoaderclass. The processMeshis defined like this.
private static Mesh processMesh(AIMesh aiMesh, List<Material> materials) {
    List<Float> vertices = new ArrayList<>();
    List<Float> textures = new ArrayList<>();
    List<Float> normals = new ArrayList<>();
    List<Integer> indices = new ArrayList();

    processVertices(aiMesh, vertices);
    processNormals(aiMesh, normals);
    processTextCoords(aiMesh, textures);
    processIndices(aiMesh, indices);

    Mesh mesh = new Mesh(Utils.listToArray(vertices),
        Utils.listToArray(textures),
        Utils.listToArray(normals),
        Utils.listIntToArray(indices)
    );
    Material material;
    int materialIdx = aiMesh.mMaterialIndex();
    if (materialIdx >= 0 && materialIdx < materials.size()) {
        material = materials.get(materialIdx);
    } else {
        material = new Material();
    }
    mesh.setMaterial(material);

    return mesh;
}
A Meshis defined by a set of vertices position, normals directions, texture coordinates and indices. Each of these elements are processed in the processVertices, processNormals, processTextCoordsand processIndicesmethod. A Mesh also may point to a material, using its index. If the index corresponds to the previously processed materials we just simply associate them to the Mesh.
The processXXX methods are very simple, they just invoke the corresponding method over the AIMeshinstance that returns the desired data. For instance, the process processVertices is defined like this:
private static void processVertices(AIMesh aiMesh, List<Float> vertices) {
    AIVector3D.Buffer aiVertices = aiMesh.mVertices();
    while (aiVertices.remaining() > 0) {
        AIVector3D aiVertex = aiVertices.get();
        vertices.add(aiVertex.x());
        vertices.add(aiVertex.y());
        vertices.add(aiVertex.z());
    }
}
You can see that get get a buffer to the vertices by invoking the mVerticesmethod. We just simply process them to create a Listof floats that contain the vertices positions. Since, the method retyrns jusst a buffer you could pass that information directly to the OpenGL methods that create vertices. We do not do it that way for two reasons. The first one is try to reduce as much as possible the modifications over the code base. Second one is that by loading into an intermediate structure you may be able to perform some pros-processing tasks and even debug the loading process.
If you want a sample of the much more efficient approach, that is, directly passing the buffers to OpenGL, you can check this sample.
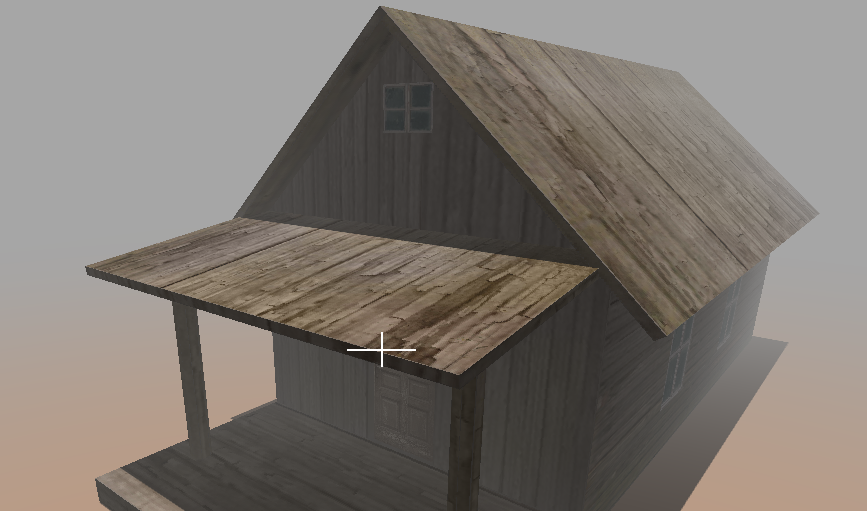
The StaticMeshesLoadermakes the OBJLoaderclass obsolete, so it has been removed form the base source code. A more complex OBJ file is provided as a sample, if you run it you will see something like this:
Animations
Now that we have used assimp for loading static meshes we can proceed with animations. If you recall form the animations chapter, the VAO associated to a mesh contains the vertices positions, the texture coordinates, the indices and a list of weights that should be applied to joint positions to modulate final vertex position.

Each vertex position has associated a list of four weights that change the final position, referring the bones indices that will be combined to determine its final position. Each frame a list of transformation matrices are loaded, as uniforms, for each joint. With that information the final position is calculated.
In the animation chapter, we developed a MD5 parser to load animated meshes. In this chapter we will use assimp library. This will allow us to load many more formats besides MD5, such as COLLADA, FBX, etc.
Before we start coding let’s clarify some terminology. In this chapter we will refer to bones and joints indistinguishably. A joint / bone is are just elements that affect vertices, and that have a parent forming a hierarchy. MD5 format uses the term joint, but assimp uses the term bone.
Let’s review first the structures handled by assimp that contain animation information. We will start first with the bones and weights information. For each Mesh, we can access the vertices positions, texture coordinates and indices. Meshes store also a list of bones. Each bone is defined by the following attributes:
- A name.
- An offset matrix: This will used later to compute the final transformations that should be used by each bone.
Bones also point to a list of weights, each weights. Each weights is defined by the following attributes:
- A weight factor, that is, the number that will be used to modulate the influence of the bone’s transformation associated to each vertex.
- A vertex identifier, that is, the vertex associated to the current bone.
The following picture shows the relationships between all these elements.

Hence, the first thing that we must do is to construct the list of vertices positions, the bones / joints / indices and the associated weights from the structure above. Once we have done that, we need to pre-calculate the transformation matrices for each bone / joint for all the animation frames defined in the model.
Assimp scene object defines a Node’s hierarchy. Each Node is defined by a name a list of children node. Animations use these nodes to define the transformations that should be applied to. This hierarchy is defined indeed the bones’ hierarchy. Every bone is a node, and has a parent, except the root node, and possible a set of children. There are special nodes that are not bones, they are used to group transformations, and should be handled when calculating the transformations. Another issue is that these Node’s hierarchy is defined fro the whole model, we do not have separate hierarchies for each mesh.
A scene also defines a set of animations. A single model can have more than one animation. You can have animations for a model to walk, run etc. Each of these animations define different transformations. An animation has the following attributes:
- A name.
- A duration. That is, the duration in time of the animation. name may seem confusing since an animation is the list of transformations that should be applied to each node for each different frame.
- A list of animation channels. An animation channel, contains, for a specific instant in time the translation, rotation and scaling informations that should be applied to each node. The class that models the data contained in the animation channels is the AINodeAnim.
The following figure shows the relationships between all the elements described above.

For a specific instant of time, for a frame, the transformation to be applied to a bone is the transformation defined in the animation channel for that instant, multiplied by the transformations of all the parent nodes up to the root node. Hence, we need to reorder the information stored in the scene, the process is as follows:
- Construct the node hierarchy.
- For each animation, iterate overeach animation channel (for each animation node): Construct the transformation matrices for all the frames. The transformation m matrix is the composition of the translation, rotation and scale matrix .
- Reorder that information for each frame: Construct the final transformations to be applied for each bone in the Mesh. This is achieved by multiplying the transformation matrix of the bone (of the associated node) by the transformation matrices of all the parent nodes up to the root node.
So let’s start coding. We will create firs a class named AnimMeshesLoader which extends from StaticMeshesLoader, but instead of returning an array of Meshes, it returns an AnimGameItem instance. It defines two public methods for that:
public static AnimGameItem loadAnimGameItem(String resourcePath, String texturesDir)
        throws Exception {
    return loadAnimGameItem(resourcePath, texturesDir,
            aiProcess_GenSmoothNormals | aiProcess_JoinIdenticalVertices | aiProcess_Triangulate
            | aiProcess_FixInfacingNormals | aiProcess_LimitBoneWeights);
}

public static AnimGameItem loadAnimGameItem(String resourcePath, String texturesDir, int flags)
        throws Exception {
    AIScene aiScene = aiImportFile(resourcePath, flags);
    if (aiScene == null) {
        throw new Exception("Error loading model");
    }

    int numMaterials = aiScene.mNumMaterials();
    PointerBuffer aiMaterials = aiScene.mMaterials();
    List<Material> materials = new ArrayList<>();
    for (int i = 0; i < numMaterials; i++) {
        AIMaterial aiMaterial = AIMaterial.create(aiMaterials.get(i));
        processMaterial(aiMaterial, materials, texturesDir);
    }

    List<Bone> boneList = new ArrayList<>();
    int numMeshes = aiScene.mNumMeshes();
    PointerBuffer aiMeshes = aiScene.mMeshes();
    Mesh[] meshes = new Mesh[numMeshes];
    for (int i = 0; i < numMeshes; i++) {
        AIMesh aiMesh = AIMesh.create(aiMeshes.get(i));
        Mesh mesh = processMesh(aiMesh, materials, boneList);
        meshes[i] = mesh;
    }

    AINode aiRootNode = aiScene.mRootNode();
    Matrix4f rootTransfromation = AnimMeshesLoader.toMatrix(aiRootNode.mTransformation());
    Node rootNode = processNodesHierarchy(aiRootNode, null);
    Map<String, Animation> animations = processAnimations(aiScene, boneList, rootNode, rootTransfromation);
    AnimGameItem item = new AnimGameItem(meshes, animations);

    return item;
}
The methods are quite similar to the ones defined in the StaticMeshesLoader with the following differences:
- The method that passes a default set of loading flags, uses this new parameter:
aiProcess_LimitBoneWeights. This will limit the maximum number of weights that affect a vertex to four (This is also the maximum value that we are currently supporting from the animations chapter). - The method that actually loads the model just loads the different meshes but it first calculates the node hierarchy and then calls to the
processAnimationsat the end to build anAnimGameIteminstance.
The processMesh method is quite similar to the one in the StaticMeshesLoader with the exception that it creates Meshes passing joint indices and weights as a parameter:
processBones(aiMesh, boneList, boneIds, weights);

Mesh mesh = new Mesh(Utils.listToArray(vertices), Utils.listToArray(textures),
    Utils.listToArray(normals), Utils.listIntToArray(indices),
    Utils.listIntToArray(boneIds), Utils.listToArray(weights));
The joint indices and weights are calculated in the processBones method:
private static void processBones(AIMesh aiMesh, List<Bone> boneList, List<Integer> boneIds,
        List<Float> weights) {
    Map<Integer, List<VertexWeight>> weightSet = new HashMap<>();
    int numBones = aiMesh.mNumBones();
    PointerBuffer aiBones = aiMesh.mBones();
    for (int i = 0; i < numBones; i++) {
        AIBone aiBone = AIBone.create(aiBones.get(i));
        int id = boneList.size();
        Bone bone = new Bone(id, aiBone.mName().dataString(), toMatrix(aiBone.mOffsetMatrix()));
        boneList.add(bone);
        int numWeights = aiBone.mNumWeights();
        AIVertexWeight.Buffer aiWeights = aiBone.mWeights();
        for (int j = 0; j < numWeights; j++) {
            AIVertexWeight aiWeight = aiWeights.get(j);
            VertexWeight vw = new VertexWeight(bone.getBoneId(), aiWeight.mVertexId(),
                    aiWeight.mWeight());
            List<VertexWeight> vertexWeightList = weightSet.get(vw.getVertexId());
            if (vertexWeightList == null) {
                vertexWeightList = new ArrayList<>();
                weightSet.put(vw.getVertexId(), vertexWeightList);
            }
            vertexWeightList.add(vw);
        }
    }

    int numVertices = aiMesh.mNumVertices();
    for (int i = 0; i < numVertices; i++) {
        List<VertexWeight> vertexWeightList = weightSet.get(i);
        int size = vertexWeightList != null ? vertexWeightList.size() : 0;
        for (int j = 0; j < Mesh.MAX_WEIGHTS; j++) {
            if (j < size) {
                VertexWeight vw = vertexWeightList.get(j);
                weights.add(vw.getWeight());
                boneIds.add(vw.getBoneId());
            } else {
                weights.add(0.0f);
                boneIds.add(0);
            }
        }
    }
}
This method traverses the bone definition for a specific mesh, getting their weights and generating filling up three lists:
boneList: It contains a list of nodes, with their offset matrices. It will uses later on to calculate nodes transformations. A new class namedBonehas been created to hold that information. This list will contain the bones for all the meshes.boneIds: It contains just the identifiers of the bones for each vertex of theMesh. Bones are identified by its position when rendering. This list only contains the bones for a specific Mesh.weights: It contains the weights for each vertex of theMeshto be applied for the associated bones.
The information contained in the weights and boneIds is used to construct the Mesh data. The information contained in the boneList will be used later when calculating animation data.
Let’s go back to the loadAnimGameItem method. Once we have created the Meshes, we also get the transformation which is applied to the root node which will be used also to calculate the final transformatio. After that , we need to process the hierarchy of nodes, which is done in the processNodesHierarchy method. This method is quite simple, It just traverses the nodes hierarchy starting from the root node constructing a tree of nodes.
private static Node processNodesHierarchy(AINode aiNode, Node parentNode) {
    String nodeName = aiNode.mName().dataString();
    Node node = new Node(nodeName, parentNode);

    int numChildren = aiNode.mNumChildren();
    PointerBuffer aiChildren = aiNode.mChildren();
    for (int i = 0; i < numChildren; i++) {
        AINode aiChildNode = AINode.create(aiChildren.get(i));
        Node childNode = processNodesHierarchy(aiChildNode, node);
        node.addChild(childNode);
    }

    return node;
}
We have created a new Node class that will contain the relevant information of AINode instances, and provides find methods to locate the nodes hierarchy to find a node by its name. Back in the loadAnimGameItem method, we just use that information to calculate the animations in the processAnimations method. This method returns a Map of Animation instances. Remember that a model can have more than one animation, so they are stored indexed by their names. With that information we can finally construct an AnimAgameItem instance.
The processAnimations method is defined like this
private static Map<String, Animation> processAnimations(AIScene aiScene, List<Bone> boneList,
        Node rootNode, Matrix4f rootTransformation) {
    Map<String, Animation> animations = new HashMap<>();

    // Process all animations
    int numAnimations = aiScene.mNumAnimations();
    PointerBuffer aiAnimations = aiScene.mAnimations();
    for (int i = 0; i < numAnimations; i++) {
        AIAnimation aiAnimation = AIAnimation.create(aiAnimations.get(i));

        // Calculate transformation matrices for each node
        int numChanels = aiAnimation.mNumChannels();
        PointerBuffer aiChannels = aiAnimation.mChannels();
        for (int j = 0; j < numChanels; j++) {
            AINodeAnim aiNodeAnim = AINodeAnim.create(aiChannels.get(j));
            String nodeName = aiNodeAnim.mNodeName().dataString();
            Node node = rootNode.findByName(nodeName);
            buildTransFormationMatrices(aiNodeAnim, node);
        }

        List<AnimatedFrame> frames = buildAnimationFrames(boneList, rootNode, rootTransformation);
        Animation animation = new Animation(aiAnimation.mName().dataString(), frames, aiAnimation.mDuration());
        animations.put(animation.getName(), animation);
    }
    return animations;
}
For each animation, animation channels are processed. Each channel defines the different transformations that should be applied over time for a node. The transformations defined for each node are defined in the buildTransFormationMatricesmethod. These matrices are store for each node. Once the nodes hierarchy is filled up with that information we can construct the animation frames.
Let’s first review the buildTransFormationMatrices method:
private static void buildTransFormationMatrices(AINodeAnim aiNodeAnim, Node node) {
    int numFrames = aiNodeAnim.mNumPositionKeys();
    AIVectorKey.Buffer positionKeys = aiNodeAnim.mPositionKeys();
    AIVectorKey.Buffer scalingKeys = aiNodeAnim.mScalingKeys();
    AIQuatKey.Buffer rotationKeys = aiNodeAnim.mRotationKeys();

    for (int i = 0; i < numFrames; i++) {
        AIVectorKey aiVecKey = positionKeys.get(i);
        AIVector3D vec = aiVecKey.mValue();

        Matrix4f transfMat = new Matrix4f().translate(vec.x(), vec.y(), vec.z());

        AIQuatKey quatKey = rotationKeys.get(i);
        AIQuaternion aiQuat = quatKey.mValue();
        Quaternionf quat = new Quaternionf(aiQuat.x(), aiQuat.y(), aiQuat.z(), aiQuat.w());
        transfMat.rotate(quat);

        if (i < aiNodeAnim.mNumScalingKeys()) {
            aiVecKey = scalingKeys.get(i);
            vec = aiVecKey.mValue();
            transfMat.scale(vec.x(), vec.y(), vec.z());
        }

        node.addTransformation(transfMat);
    }
}
As you can see, an AINodeAnim instance defines a set of keys that contain translation, rotation and scaling information. These keys are referred to specific instant of times. We assume that information is ordered in time, and construct a list of matrices that contain the transformation to be applied for each frame. That final calculation is done in the buildAnimationFramesmethod:
private static List<AnimatedFrame> buildAnimationFrames(List<Bone> boneList, Node rootNode,
        Matrix4f rootTransformation) {

    int numFrames = rootNode.getAnimationFrames();
    List<AnimatedFrame> frameList = new ArrayList<>();
    for (int i = 0; i < numFrames; i++) {
        AnimatedFrame frame = new AnimatedFrame();
        frameList.add(frame);

        int numBones = boneList.size();
        for (int j = 0; j < numBones; j++) {
            Bone bone = boneList.get(j);
            Node node = rootNode.findByName(bone.getBoneName());
            Matrix4f boneMatrix = Node.getParentTransforms(node, i);
            boneMatrix.mul(bone.getOffsetMatrix());
            boneMatrix = new Matrix4f(rootTransformation).mul(boneMatrix);
            frame.setMatrix(j, boneMatrix);
        }
    }

    return frameList;
}
This method returns a list of AnimatedFrame instances. Each AnimatedFrame instance will contain the list of transformations to be applied for each bone for a specific frame. This method just iterates over the list that contains all the bones. For each bone:
- Gets the associated node.
- Builds a transformation matrix by multiplying the transformation of the associated
Nodewith all the transformations of their parents up to the root node. This is done in theNode.getParentTransformsmethod. - It multiplies that matrix with the bone’s offset matrix.
- The final transformation is calculated by multiplying the root’s node transformation with the matrix calculated in the step above.
The rest of the changes in the source code are minor changes to adapt some structures. At the end you will be able to load animations like this one (you need yo press space par to change the frame).

The complexity of this sample resides more in the adaptations of the assimp structures to adapt it to the engine used in the book and to pre-calculate the data for each frame. Beyond that, the concepts are similar to the ones presented in the animations chapter. You may try also to modify the source code to interpolate between frames to get smoother animations.